Holiday Hours - All Locations:
Wednesday, December 24th: CLOSEDThursday, December 25th: CLOSED
Friday, December 26th: CLOSED
New Year’s Day- Thursday, January 1st: CLOSED
From all of us at East Hardwood Company, Inc., we wish you a Merry Christmas and a Happy New Year!

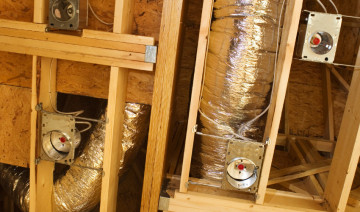
On most projects, HVAC flexible ductwork is located in designated chases that maximize the efficiency of the airflow. But the path for the final branch of the flexible ductwork tree—the one that runs from the trunk or plenum to the outlet register—is typically chosen by the subcontractor. Often, they find themselves competing to find space to run the ducts among all the wiring and piping already installed by the electrical and plumbing trades.
Flexible ducts can speed installation by reducing the number of joints in a run and eliminating the need for elbows and offsets. They also easily conform to oval as well as round connectors. But the physical properties of flexible ducts that create advantages are also the source of potential problems if care isn’t taken during installation. A good first step, or course, is to make sure there is effective communication among all the parties involved, including designers, framers, and HVAC, plumbing, and electrical tradespeople.
But it doesn’t hurt to have visual aids when discussing, monitoring, or inspecting the work. The details presented here were captured from the U.S. Department of Energy’s Building America videos and cover the fundamentals of flexible duct design and installation. A lot of what you’ll find here is common sense, but don’t let that fool you. Airflow is more complicated than it seems, and carelessness or disregard for these best practices can really come back to bite you.
All ducts should be sealed using UL-181–rated duct mastic, and flexible ducts should be held in place with tie wraps at all connectors. Ideally, all ducts should be located within the conditioned space. This is typically the case for ducts that run through a dropped ceiling or soffit, or between joists, so long as the floor system sits on top of a conditioned basement or crawlspace. Attics can be problematic when insulation is located in the attic floor rather than in the rafter bays or, better yet, outside the roof sheathing.
When ducts are located outside the conditioned space, they should be sealed to prevent loss of conditioned air and also insulated to prevent thermal loss or gain from the ambient air.
Friction is the enemy of airflow. Unlike rigid ducts, which are cut to length within a tolerance of 1 inch or less, it’s easy to cut a length of flexible duct that’s several feet longer than is needed to get from point A to point B. That creates slack in the duct, which reduces airflow for two reasons. First, because the air has to travel farther, it is exposed to more of the duct’s interior surface area. Second, because the duct isn’t stretched tight, the wire ribs in the duct create more friction than usual along the entire length of duct.
To maintain strong airflow, plan for short, straight runs during the design phase. Pay particular attention to the framing plan, and route ducts through floor trusses where possible. Monitor the plan during framing and be prepared to create chases to carry ducts where necessary. Also make sure that all ducts, regardless of length, are stretched tight between fittings.
Airflow in a duct run of any length can be compromised by sharp turns or even kinks. And each turn, kink, or compression in a duct run reduces airflow, which results in more comfort-related complaints from your customers.
Unfortunately, on many jobsites, poor planning of the framing and lack of coordination among subtrades result in all manner of bends and kinks, some of which all but stop airflow completely.
Once the drywall is up, these problems are impossible to locate, so carefully inspect flexible ductwork before the drywall crew begins its work. Kinks are comparatively easy to spot, but a sharp bend can constrict airflow and is more difficult to see. Where bends can’t be avoided, make sure that the radius of any turn is at least the same dimension as the duct diameter. For example, the center line of a bend in 8-inch–diameter duct should follow a curve with a radius of at least 8 inches [3C]. One easy way to ensure that bends meet this standard is to use metal elbows at these critical locations.
Sometimes the best route for a flexible duct run is up and over an obstruction. But without proper support, ducts can develops sags or kinks that reduce airflow.
To prevent problems, use saddles or straps to support at regular intervals. Follow the manufacturer’s instructions, but in case they “get lost,” here is a list of best practices for supporting ducts:


